5.4 ShowaCup-TopHonda TRAC Anti-Dive BrakesVF500 1982-83 type | |
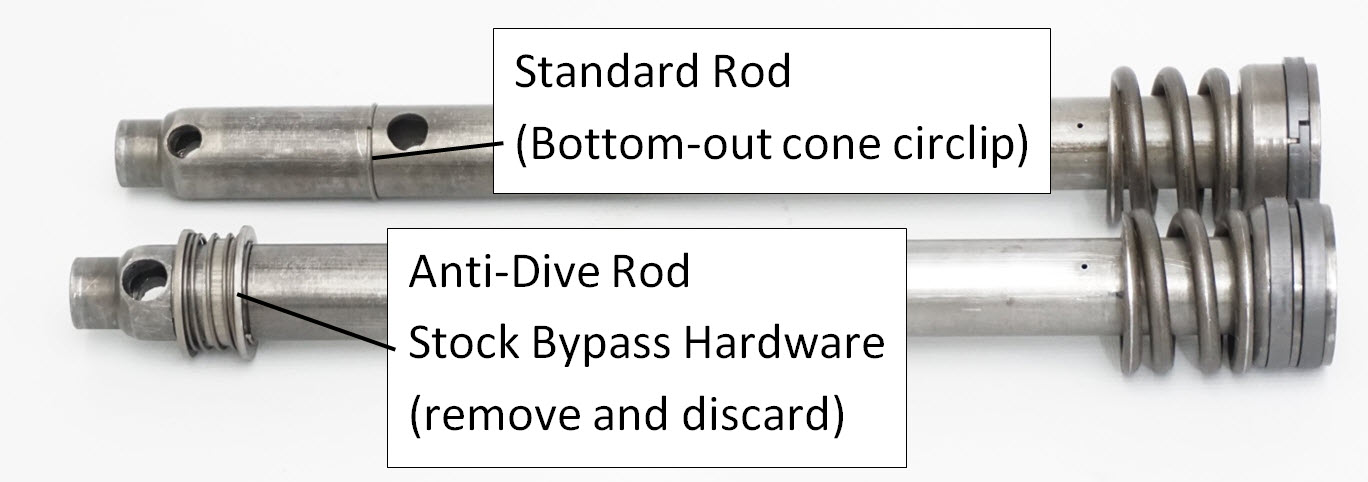
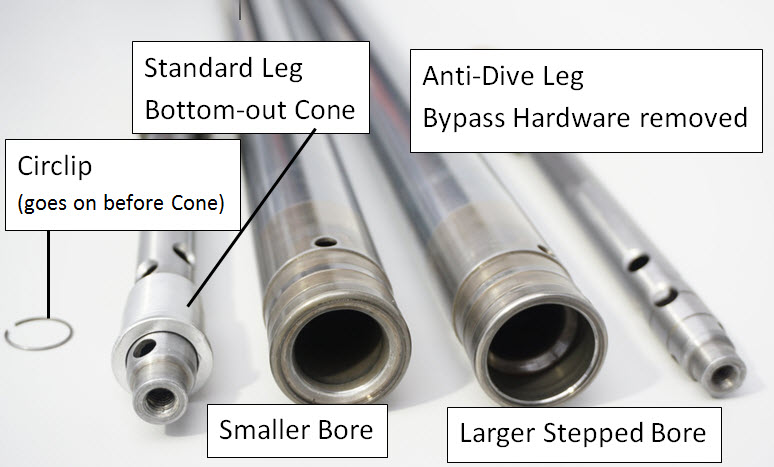
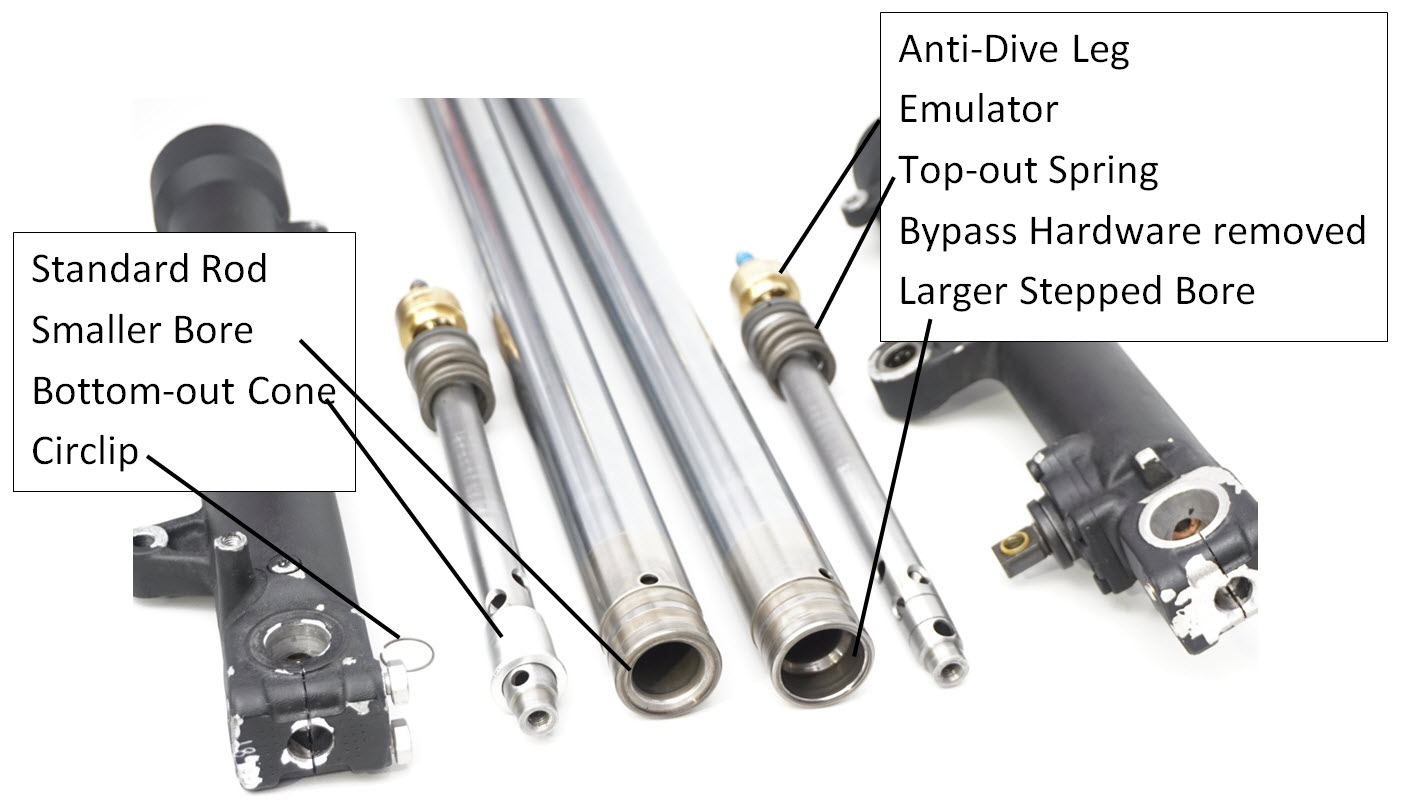
Identify your Hardware The Anti-Dive leg has different hardware than the Standard leg. This includes the fork tube itself. When disassembling keep all parts of each leg separate. Keep in mind that many of these older bikes have been taken apart before and are mixed up. See the images below to identify the correct pairing of the hardware. The Anti-Dive Leg does not have a bottoming cone. You will be leaving the Anti-Dive Bypass Hardware off. | |
Anti-Dive Rod Modification The stock Anti-Dive damping rod has bypass hardware on it consisting of clips, washers and a spring. Remove the Anti-Dive Bypass Hardware and discard. This will disable the Anti-dive. Anti-Dive Rod - Drill (4) 8mm (5/16") compression feed holes starting 10mm above the existing holes at 90 degrees to the original holes. Drill a second set of holes 10mm above the first new set also at 90 degrees. Deburr the these holes inside and out. Note - when drilling the compression holes you may end up drilling one set of holes at or thru the top clip grove in the damping rod, this is fine. | |
Standard Rod Modification Standard Rod - Drill (4) 8mm (5/16") compression feed holes starting 10mm above the circlip groove. Drill a second set of holes 10mm above the first new set at 90 degrees. Deburr all new holes inside and out. | |
Ready to Assemble Install the top-out spring on the damping rod first. Then insert the damping rod into the correct fork tube. On the Standard Leg install the circlip that retains the bottoming cone then install the bottoming cone. This image includes the outer fork legs. Note the external Anti-Dive valve on the right. You do not need to modify the TRAC Valve itself. The Emulator for these forks does not require an adapter. Be sure to setup the Emulator valving and fork spring preload according to the DVS Setup Sheet. Install the recommended fork oil. See Standard Emulator Installation Instructions. |


