IP QFSKS03 Sport Front Spring Kit HON TRX450R
RACE TECH HI-PERFORMANCEATV SPORT SERIES FRONT SPRING KITHONDA TRX450R, SUZUKI LTZ400 AND KAWASAKI KFX400<IP_QFSKS03.doc> QFSK ATV Sport Series Spring Kits E Rios-Race Tech ã8-24-08 INCLUDES: qty 2 of each: Main Spring, Secondary Spring, Preload Spacer, Go-Between Collars, and Crossover Rings. TOOLS REQUIRED: Service Manual, Vise with Soft Jaws TMVJ 065 or equivalent, TSPA 01 Preload Adjusting Tool or Spanner Wrench, ¼” Flat Blade Screwdriver, TSSM 01 Sag Master or Calipers and Mechanical or Hydraulic Spring Compressor. DIGITAL VALVING SEARCH (DVS) Printout: See DVS at www.racetech.com for your custom spring setup specs.
Support the rear of the ATV securely; remove rear shock per the procedure in your service manual. Install the Race Tech Spring Kit as follows: (NOTE: your model may look different.) Note: Click on the images to enlarge. |
|
|
|
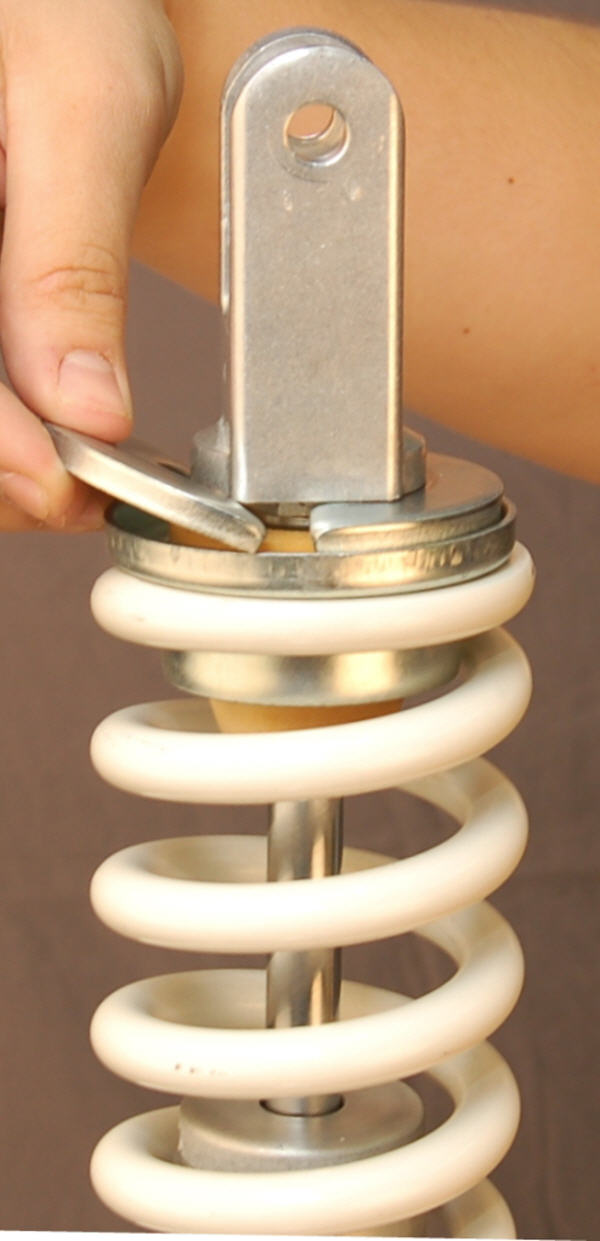
Disassembly D1Clamp Shock into a vise with Soft Jaws. D2Loosen Lock Ring. D3Remove all spring preload using a Spanner Tool or by loosening the Collar by hand. D4Clean and lube the threads.
|
|
|
Disassembling the Retaining Collar
D5Use a small Screwdriver or similar tool. Find the opening in the plastic Dust Shield and gently pry the Bottom-out Bumper away from the end of the Shock approximately 50mm (2”).
D6Use a Hydraulic Spring Compressor to compress the stock spring and remove the Spring Retaining Collar.
D7Remove the stock spring and Dust Shield.
*Note*
The Honda TRX450R front shock requires the spring to be compressed approximately 25mm (1”) to safely remove the stock spring. A Mechanical or Hydraulic style Spring Compressor should be used to safely remove the spring. Many suspension shops have a spring compressor such as this. If you are unable to find a shop in your area please feel free to contact Race Tech for details on purchasing a spring compressor. You can also send your shocks to Race Tech and we will be happy to install the Spring Kit for you.
|
|
|
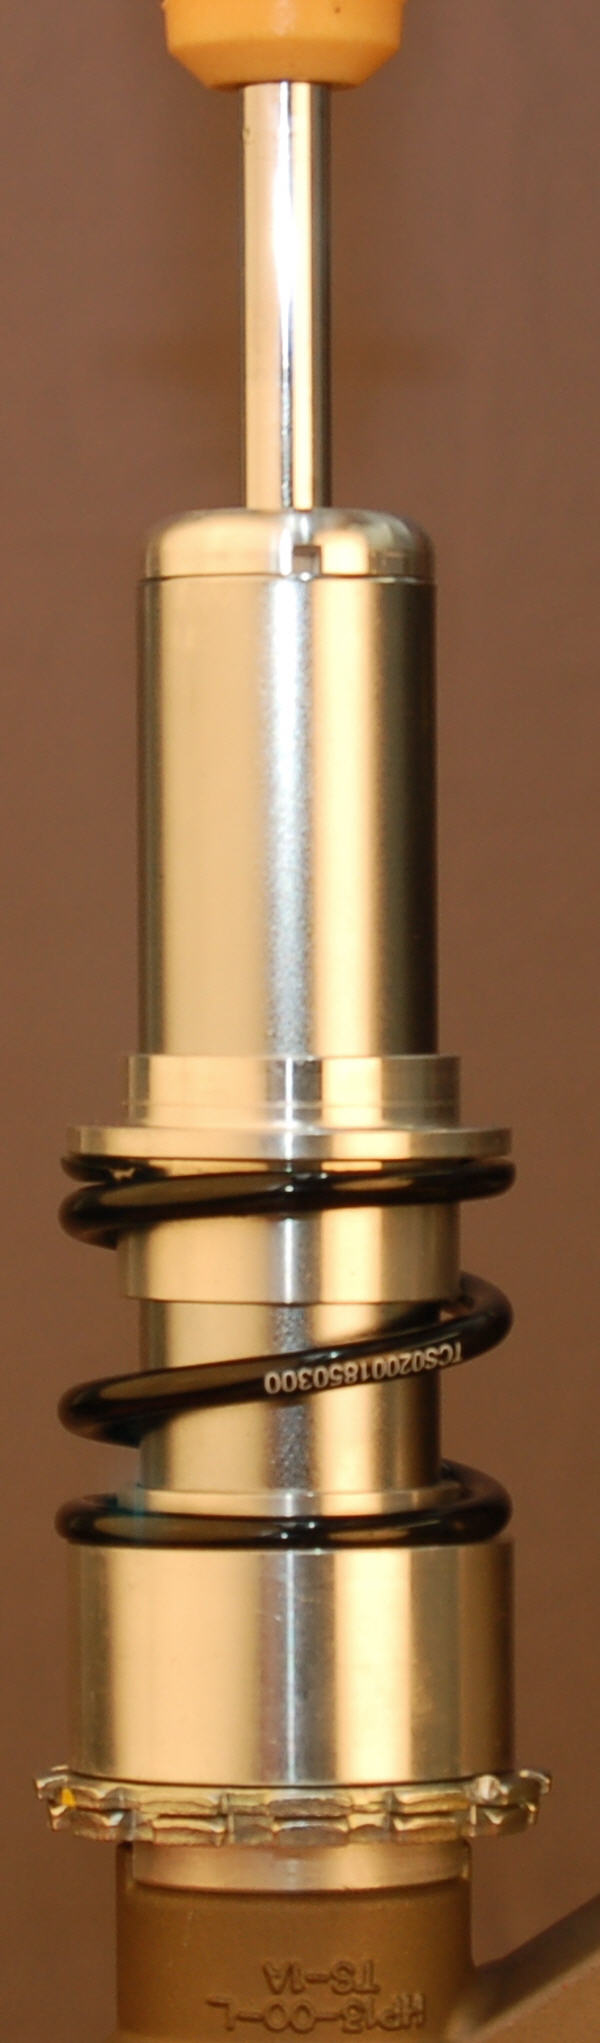
Spring Kit Assembly A1 Install the Preload Spacer over the Stock Preload Adjuster Assembly. A2 Install the Secondary Spring. A3 Install the Go-Between with the long flange extending into the Secondary Spring. A4 Install the Main Spring and Lower Spring Retaining Collar. |
|
|
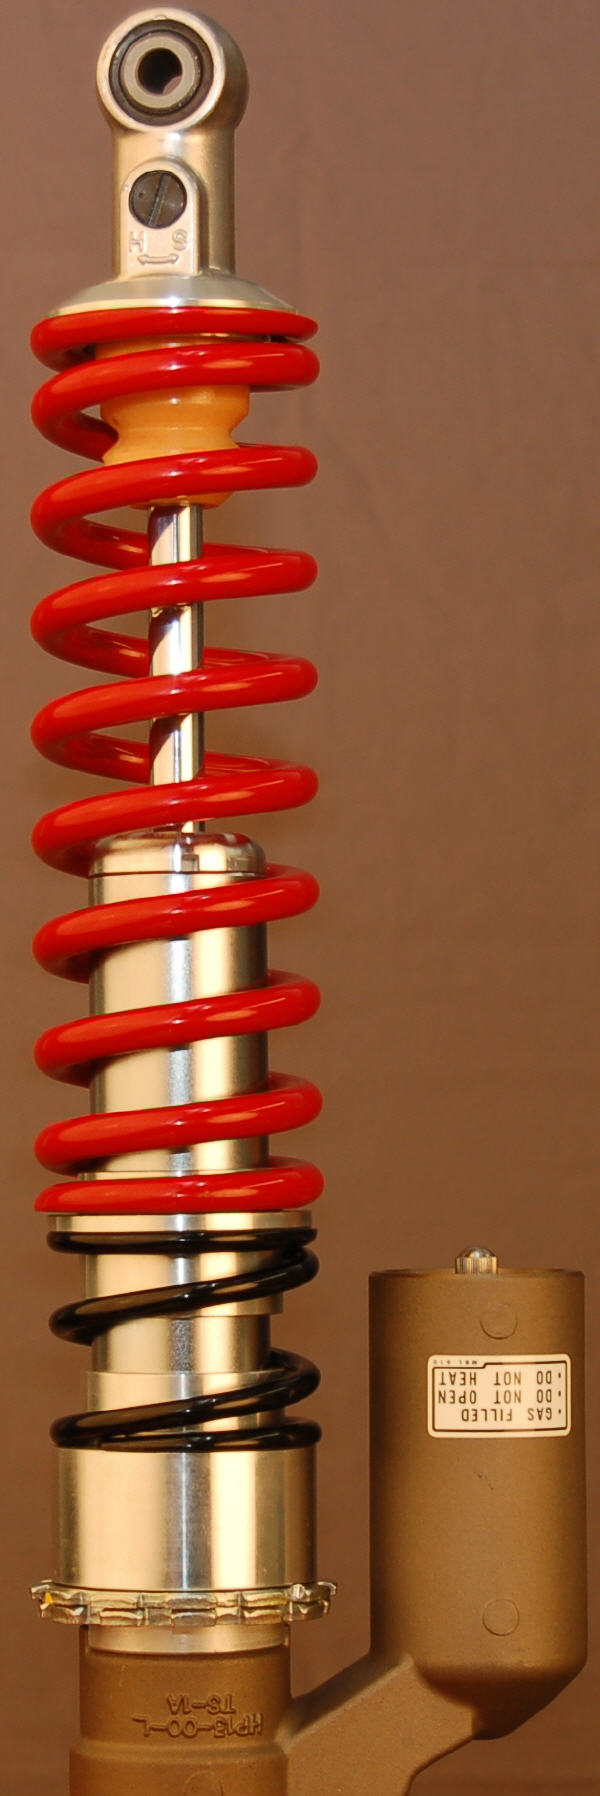
Tuning Options A5 A stacked spring can provide a progressive spring rate. When the shock compresses and the Go-Between flanges touch, the spring rate gets stiffer. Adding Crossover Rings decreases the Crossover Distance and makes it stiffer sooner. A6 Crossover Rings can be inserted between the Go-Between flanges extending into the Secondary Spring. The two main reasons for adding Crossover Rings are excessive body roll and bottoming-out. Crossover Rings are provided in ⅛”, ¼” and ½”. A7 Install the proper Crossover Rings (if recommended). Refer to the DVS Specs at www.racetech.com to get the recommended Crossover distance for your application (you don’t need an Access Code to get spring setup specs). |
|
|
Preload Setup P1 Refer to the DVS Specs from racetech.com to get the Preload Spec. P2 Adjust the Preload Collar to set the initial preload with Tape Measure.
Note: Preload is the distance the spring assembly is compressed initially at full shock extension.
Measure the overall length of the spring assembly with no tension. Subtract the Preload (from the DVS Spec) to calculate the installed length of the spring assembly. Then use the Preload Adjusting Collar to adjust the overall spring length. |