Skip to content
RT_E2_Logo

SUSPENSION & ENGINES

  • SEARCHES
    • Product Search
    • DVS Valving Search
    • Spring Rate Search
    • TNK Fork Tube Search
    • Instructions Search
    • Basic Setup Search
    • Engine Search
  • PRODUCTS
    • Suspension
    • Engines
    • Lubricants
    • Tools
      • Fork Tools
      • Shop Tools
      • Shock Tools
      • Dyno Mounts – CTW and Roehrig
      • Engine Tools
    • RT Merch
    • Stickers-Banners
    • Suspension Bible
    • Vintage (pre-2000)
  • SERVICES
    • Suspension
    • Engines
    • Brake Arcing
    • Race Tech Centers
  • ABOUT
    • About Race Tech
    • Contact Us
    • RT Policies
    • Rider Support
  • RESOURCES
    • Instructions
    • Service Request Forms
    • Shipping
    • Contact Us
    • Suspension Bible
    • Mental Edge Video
    • Seminars
    • Downloads
  • LOGIN
  • CART
PRODUCT SEARCH
DVS VALVING SEARCH
SPRING RATE SEARCH
ENGINE SEARCH

RACE TECH HI-PERFORMANCE
RACE SERIES REAR SPRING KIT

INCLUDES: NPL Collar, NPL Spring, Go-Between, Lower Spring Retainer and Sizing Collar (selected models). 

TOOLS REQUIRED: Service Manual, Shock Spring Compressor- Screw Type TSSC 02, Vise with Soft Jaws TMVJ 065 or equivalent, TSPA 01 Preload Adjusting Tool or Spanner Wrench, ¼” Flat Blade Screwdriver, TSSM 01 Sag Master or Calipers.

DIGITAL VALVING SEARCH (DVS) printout: See DVS for your custom spring setup.

Support the rear of the ATV securely. Remove rear shock per the procedure in your service manual.  Your model may look different.

Click to enlarge.

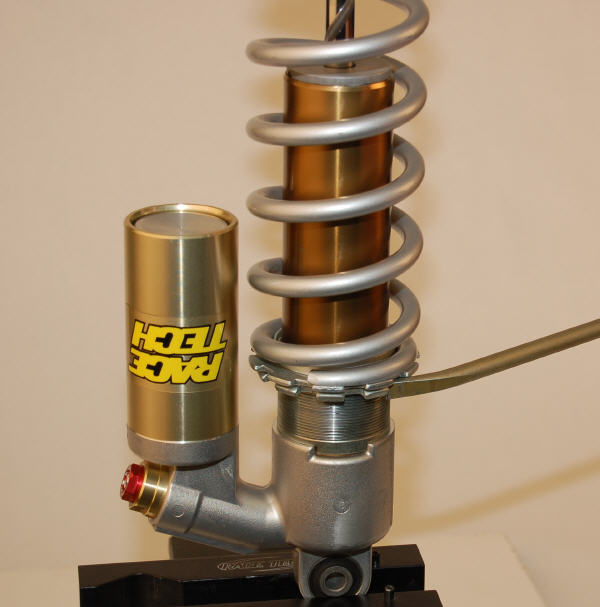
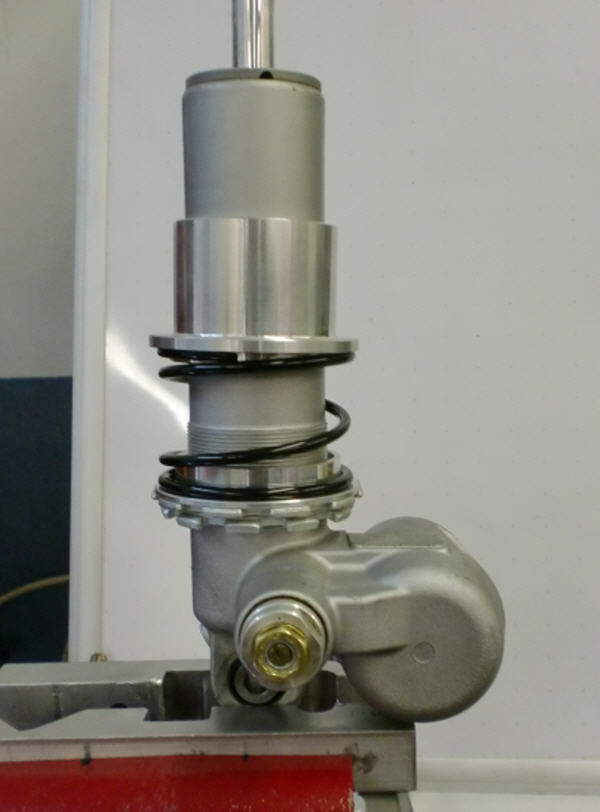
Stock Spring Disassembly

D1 Clamp Shock in a Vise with Soft Jaws.

D2 Loosen the Preload Collar Lock Ring using a TSPA 01 Preload Adjusting Tool or Spanner Wrench.

D3 Remove all spring preload by unscrewing the Collars. Use a Spanner Tool if necessary.

D4 Use a small screwdriver to gently pry the Bottom Out Bumper away from the end of the Shaft.

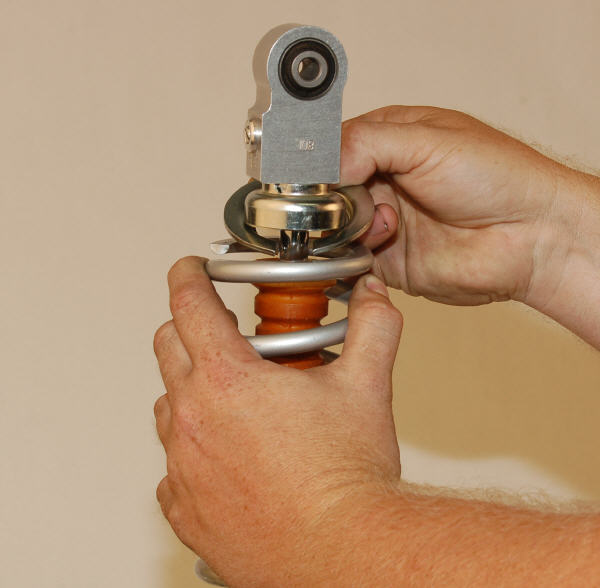
D5 Remove the C-Clip Spring Retainer by pulling the Spring down and sliding the Clip out from under the Bumper Cup.

D6 Remove the stock Spring.


The stock Preload Collar and Lock Ring will be used with the Race Tech Spring Kit. It is a good idea to clean and grease the threads on both the Preload Collar and Lock Ring before installation of the Spring Kit.

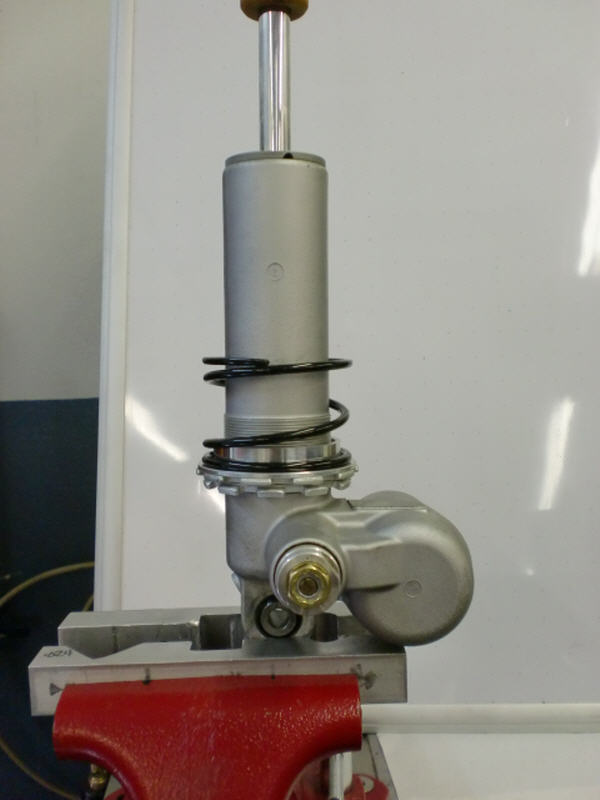
Base Kit and Main Spring Assembly

A1 Install the NPL Collar (single flange) with the long end of the Flange facing the bottom of the shock (upward in the picture).

A2 Install the NPL Spring over the NPL Collar.

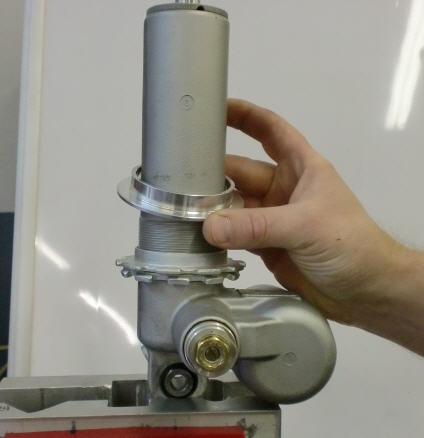
A3 Install the Go-Between Collar. The step on the inside diameter of the Go-Between goes toward the threaded portion of the shock body; this provides proper clearance for the Collar to pass over the Threads during operation. If this step does not go towards the threads the Collar could get stuck causing damage.

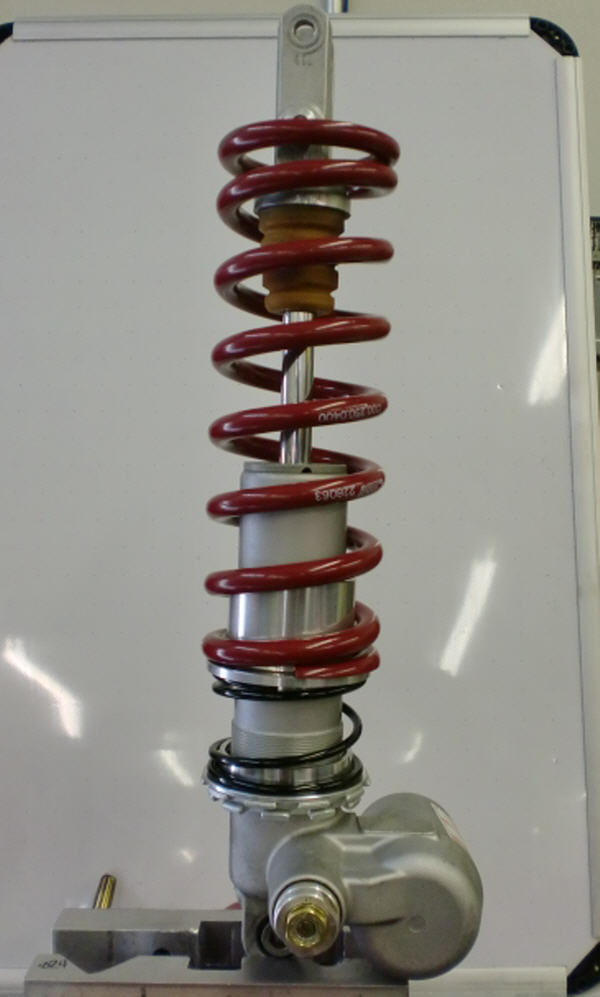
A4 Install the Main Spring (sold separately). Refer to Race Tech’s Spring Search at www.racetech.com for the proper spring series and rate selection.

A5 Install the Spring Sizing Collar included in the kit into the end of the Main Spring. This Collar necks down the Spring, allowing proper clearance between the new Spring Retainer and the Spring.

A6 Follow the instructions included in the Race Tech Shock Spring Compressor tool (TSSC 02) and compress the spring set enough to allow space for the installation of the new Lower Spring Retainer.

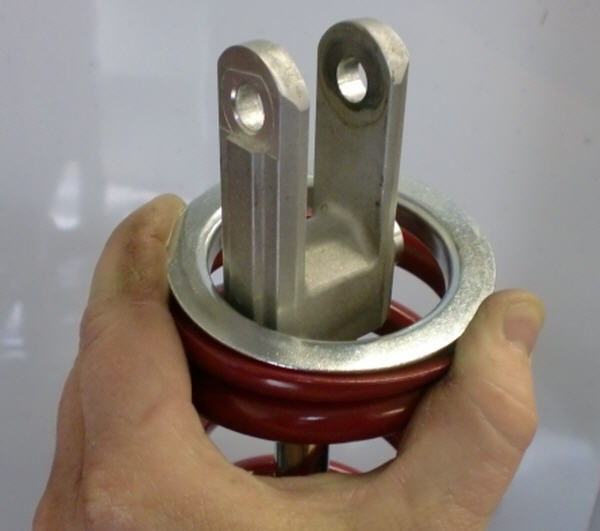
A7 Pull the Bumper Cup up far enough to slide the Spring Retainer under it and into place. Make sure the Bumper Cup is located properly inside the Spring Retainer (not cocked sideways) and remove the TSSC 02 Shock Spring Compressor from the shock.

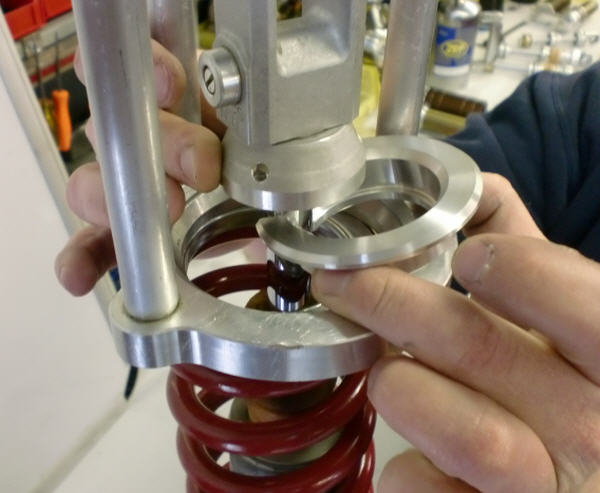
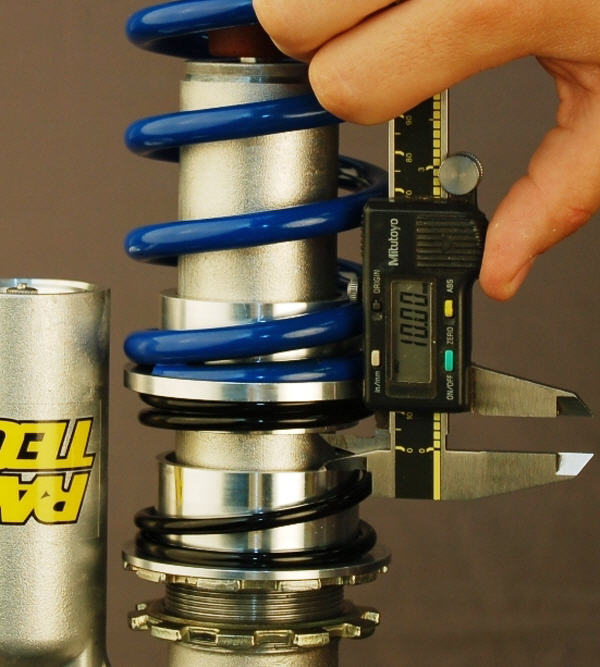
NPL Gap Setup

A8 Refer to the DVS Specs from www.racetech.com

A9 Adjust the Preload Collar to set the Gap between the flanges of the NPL and Go-Between Collars.  Use a Caliper or Tape Measure.

A10 Gently tighten the Lock Ring against the Preload Collar being careful not to change the Gap.


Note:

NPL Gap is the distance between the NPL Collar Flange and the Go-Between Collar Flange that extends into the NPL Spring.


This distance determines the ride height of the ATV. A larger Gap equals a lower Ride Height; a smaller gap creates a higher Ride Height

RT_E2_Logo

951.279.6655

info@racetech.com

1501 Pomona Rd. Suite 101
Corona, CA 92878

STOP! Include Service Request Form when shipping components to Race Tech.

twitter link facebook link instagram link

© 2025 Race Tech. All Rights Reserved

  • Downloads
  • Dealer Application
  • Policies
  • Cookie Policy (EU)
Race Tech
We Respect Your Privacy
To provide the best experiences, we use technologies like cookies to store and/or access device information. Consenting to these technologies will allow us to process data such as browsing behavior or unique IDs on this site. Not consenting or withdrawing consent, may adversely affect certain features and functions.
Functional Always active
The technical storage or access is strictly necessary for the legitimate purpose of enabling the use of a specific service explicitly requested by the subscriber or user, or for the sole purpose of carrying out the transmission of a communication over an electronic communications network.
Preferences
The technical storage or access is necessary for the legitimate purpose of storing preferences that are not requested by the subscriber or user.
Statistics
The technical storage or access that is used exclusively for statistical purposes. The technical storage or access that is used exclusively for anonymous statistical purposes. Without a subpoena, voluntary compliance on the part of your Internet Service Provider, or additional records from a third party, information stored or retrieved for this purpose alone cannot usually be used to identify you.
Marketing
The technical storage or access is required to create user profiles to send advertising, or to track the user on a website or across several websites for similar marketing purposes.
Manage options Manage services Manage {vendor_count} vendors Read more about these purposes
View preferences
{title} {title} {title}
Scroll To Top